vExpert Homelab 4 - Installing a vCenter 6 VCSA using an external PSC
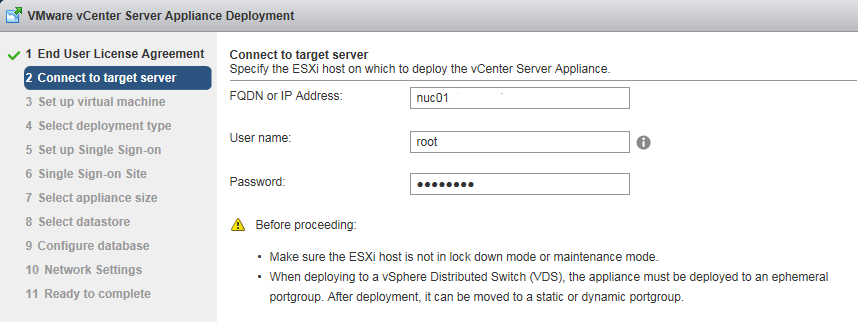
Following directly on from my previous post where I install a PSC, it’s time for a vCenter. There’s not a lot of point having one without the other. The webpage I used to install the PSC is still open so I can just click on Install again and accept the EULA again and it is right back to the connecting to target server options once more.
The same options as last time for this. Entering a valid ESX host and root level credentials.
An SSL cert warning and validation routine follows.
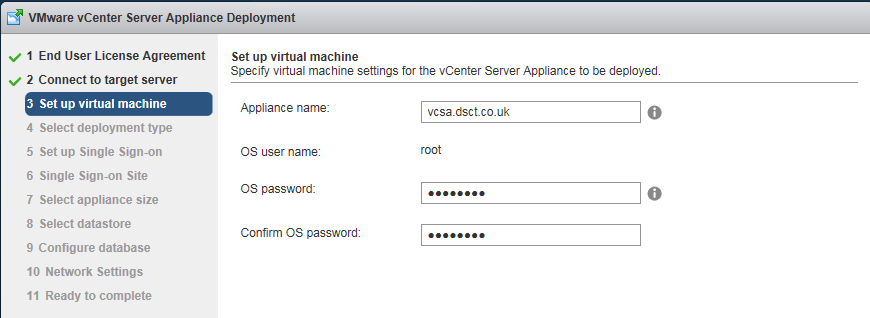
There’s an immediate validation after this step and you’ll also get asked to verify a new SSL cert (don’t worry, SSL will get easier in 6.0!) Then you need to pick an appliance name and select a password.
This time I’m installing a more normal vCenter so again I used an imaginative name. You need a suitably complex password, I ended up using upper case, lower case, numeric and special characters. Make sure you have your FQDN set up in DNS.
Now, time for a different choice. Install a vCenter Server which Requires an External PSC.
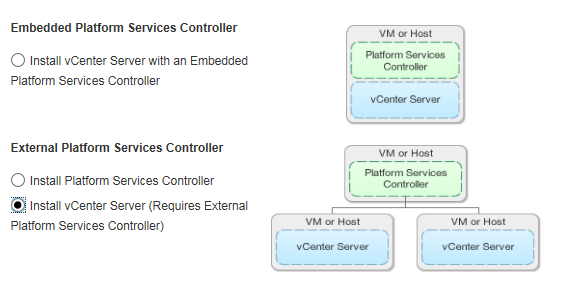
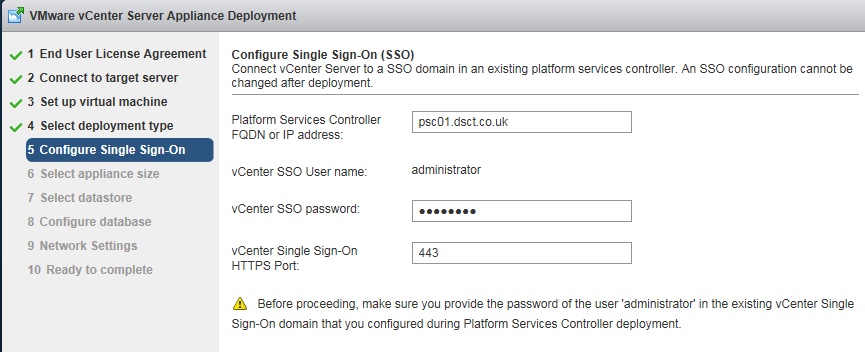
More changes from the PSC installation, this time you need to refer to the PSC you set up previously. Note here that the SSO config cannot be changed after deployment!
Then there’s a validation step as the installation has to go and ensure you typed in the correct FQDN and credentials.
You’ll then need to select the size of your appliance.
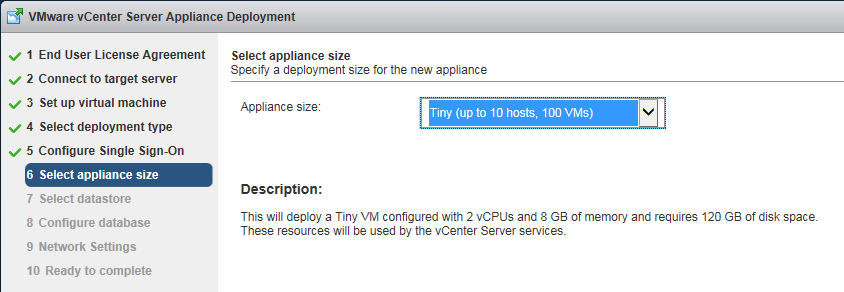
Tiny (up to 10 hosts, 100 VMs) 2vCPUs and 8 GB memory. 120 GB disk space. Small (up to 100 hosts, 1,000 VMs) 4 vCPUs and 16 GB memory. 150 GB disk space. Medium (up to 400 hosts, 4,000 VMs) 8 vCPUs and 24 GB memory. 300 GB disk space. or Large (up to 1000 hosts, 10,000 VMs) 16 VCPUs and 32 GB memory. 450 GB storage.
More validation and then on to selecting the datastore again,
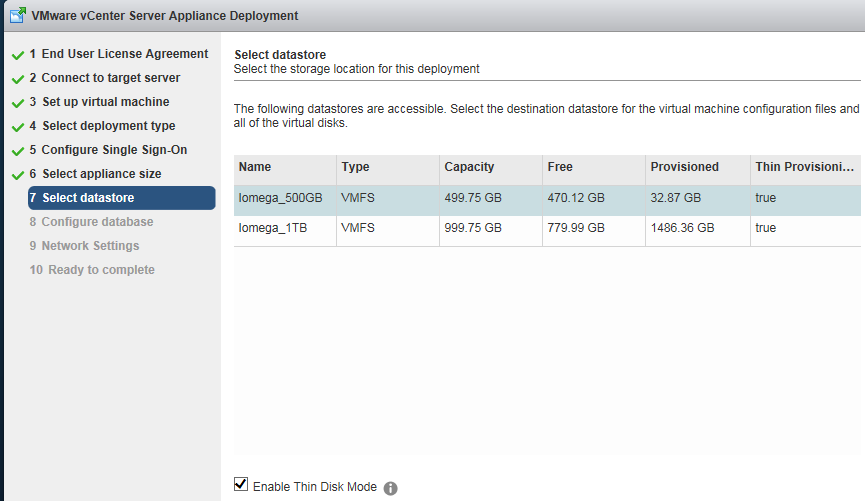
Again, I selected the option to thin provision.
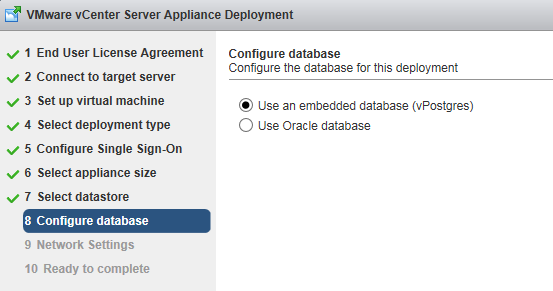
Not sure I want to mess with Oracle, has to be vPostgress DB all the way!
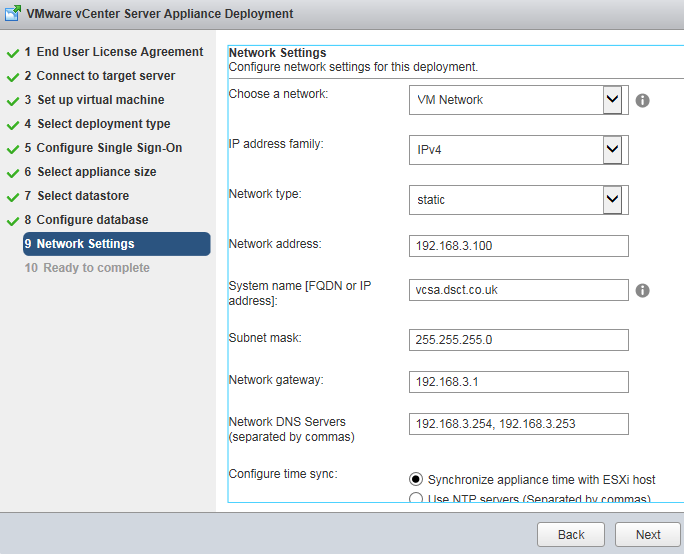
The network settings screen, same deal with making sure you have your DNS set up in advance.
I selected the option to sync time with my ESXi host as I am not running my own time servers, so they’d be external to the lab at any rate.
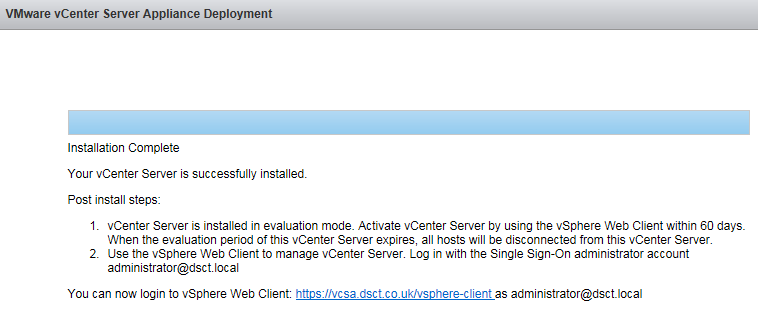
Then the summary screen and click Finish.
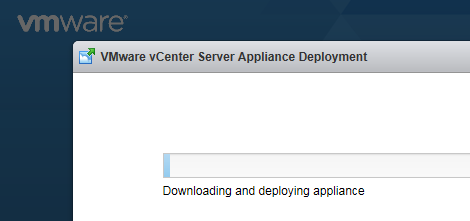
And wait quite a while for a successful completion…